Wednesday, December 19, 2007

File sharing between MacOSX and Ubuntu in Parallel Desktop 3

I had been using Parallel Desktop for running Windows and Ubuntu Linux in my MacOSX Leopard. Windows support is really very good in Parallel Desktop taking into account the coherence, clipboard and all in one file sharing options. Unfortunately, coherence is not supported under Linux and no straight forward way for file sharing. Here is a way that I figured out after fiddling with Parallel for an hour and it works prettly well for me.

In Leopard, System Preferences > Sharing
Turn on File sharing. Add as many folders that you want to share. Please note down the IP address, you'll need this later. Click on Options


Choose the protocol that you want to use to share your files. In this case I chose SMB (samba). Click on Done.

Now we need to turn on Internet Sharing. As I use bluetooth to connect to my phone for using gpinternet, I chose to share Bluetooth and then chose via 'Airport'.

Now open VM configuration window for Ubuntu Linux. For Network Adapter we need to choose 'Bridged Ethernet' and then 'Airport/Wireless Adapter'.


Now fire up your Ubuntu VM, when desktop emerges, from the Network Applet in the top right corner of the screen, choose 'Wired Connection'. It will automatically configure the new network.

Now open a nautilus windows and type the IP address that you noted down in the address bar. In my case I had to write down this: smb//10.65.23.158. Shared folders from Mac account will appear right away.

Got myself A MacBook


I bought an Apple MacBook (white) a couple of days ago. My mom gave it me as an early birthday present. :) Love you mom!

Saturday, November 10, 2007

Installing Bengali fonts in Gentoo

Here is how you can install Bengali fonts in Gentoo and its derivatives:

#emerge fonts-indic free-bangla-font

Make sure you have use="X" flag enabled in /etc/make.conf

Thursday, June 07, 2007

Creating Ubuntu Addon CD

I, along with my friend salahuddin had been trying to make an addon cd for our Favourite Ubuntu 7.04 Feisty Fawn for those who does not have any internet connection. Salahuddin mainly worked on the package selection and dependency solving while I worked on writing a easy to use script to make the cd-making process easier. After some days hard work we were able to make one. Here is the whole procedure of making an addon cd that is compatible with the official ubuntu cd:

1. First download the packages with dependencies in your hard drive. One way to do this is using apt-get with -dy switch. For example you want to add eclipse in the addon cd. Then


$sudo apt-get install -dy eclipse eclipse-cdt
$sudo apt-get autoclean


By default these files are stored in /var/cache/apt/archives.

2. Now execute this script


#!/bin/sh

mkdir -p addon-ubuntu/dists/fiesty
cd addon-ubuntu/dists
ln -s fiesty/ stable
ln -s fiesty/ unstable
cd ..
mkdir pool
cp `find /var/cache/apt/archives/ | grep deb | grep -v /partial/` pool

dpkg-scanpackages pool /dev/null | gzip -9c > dists/fiesty/Packages.gz
gunzip -c dists/fiesty/Packages.gz > dists/fiesty/Packages
dpkg-scansources pool /dev/null | gzip -9c > dists/fiesty/Sources.gz
gunzip -c dists/fiesty/Sources.gz > dists/fiesty/Sources

echo "Origin: Ubuntu\nLabel: Ubuntu\nSuite: feisty\nVersion: 7.04\nCodename: feisty\nDate: `date -R`\nArchitectures: i386\nComponents: main restricted\nDescription: Ubuntu Feisty 7.04" > dists/fiesty/Release

apt-ftparchive release dists/fiesty >> dists/fiesty/Release
mkdir .disk

echo "Ubuntu 7.04 "Feisty Fawn" - Release i386 (`date +%Y%m%d`)" > .disk/info

cd ..
genisoimage -o ubuntu-addon.iso -r addon-ubuntu
#end of script


3. Now burn the ubuntu-addon.iso into a blank CD/DVD

4. Put the newly burned CD/DVD into the desired PC's CD/DVD drive. Open Synaptic Package Manager. There from the Edit menu selec Add CD rom and Press OK.

Now you can install all the new packages from the CD/DVD you just created. No need to download them from the net!

Monday, May 28, 2007

More Secure Gmail

By default Gamil uses normal http, not secure http to transfer user data. But you can change that behaviour. Just change the http://mail.google.com to https://mail.google.com while you are checking your mail and have more secure and better gmail experience.

We all love Gmail!

Sunday, May 27, 2007

Using Javadoc With Eclipse

Normally, when we are coding java in Eclipse, we do not see any javadoc help when we hover over a keyword. This is because by default, eclipse is not configured to use javadoc. This is how you can enable javadoc in eclipse.

1. In the package explorer select the JRE System LIbrary -> rt.jar and go to it's properties.

2. In the Javadoc Location provide the javadoc URL. This may be eiher a URL like "http://java.sun.com/javase/6/docs/api/" or a local path like mine "file:/usr/lib/jvm/java-6-sun/docs/api/" (if you have javadoc installed locally, which is recommended)

3. Now when you mouse-hover on a java method or something, you shall see its associated javadoc. If its lengthy and you can't see all of it, press F2.

Wednesday, May 23, 2007

Sun Studio 11 in Debian

Yesterday when I tried to install sun studio 11 in my Debian Sid, I was a bit disappointed when I learned that they only provide the rpm packages for Sun Studio. Anyways, I was able to install that with the help of alien.

Here is a short how-to of doing that:

1. Download sun studio 11 from here.

2. Install some necessary packages:

$sudo apt-get install libmotif-dev sun-java5-jdk fakeroot alien

[Note: This version of sun studio does not run with sun-java6-jdk]

3. Go to the folder where you downloaded sun studio and execute these:

mkdir sun-studio
cd sun-studio/
tar xvjf ../studio11-lin-x86.tar.bz2
cd kits/ide/
mkdir packages_deb
cd ../packages
cp `ls -1 *.rpm | grep -v locale | grep -v motif | \
grep -v x86_64` ../packages_deb/

cd ../packages_deb/
fakeroot alien *
rm -f *.rpm
sudo dpkg -i --force-overwrite *.deb

[Note: If you are running a 64 bit OS then omit grep -v x86_64 part.]

4. The installation is complete now.

Both Sun Studio and NetBeans IDE are installed in /opt/sun by default.

Now you can run Netbeans IDE 3.5 by running this:

$/opt/sun/netbeans/3.5V11/bin/runide.sh -jdkhome /usr/lib/jvm/java-1.5.0-sun

And run Sun Studio 11 by executing this:

$/opt/sun/sunstudio11/bin/sunstudio --jdkhome /usr/lib/jvm/java-1.5.0-sun

[Note: The package comes bundled with j2sdk 1.4 (look inside kits folder), so you can also install that in place of sun-java5-sdk. When you alien that rpm be sure to use the '--scripts' switch.]

You can find more info here.

Wednesday, May 16, 2007

Who Says Penguin Can't Game?

My close friend Himel always gets me on the nerve when he says that "Linux is bad cause you can't play 3D games there". Yeah, he is a die hard gamer and always keeps himself busy in playing different games. And in this regard he is partially right as game developer rarely provide any Linux port of their games.

Well, those days are over my friend. Its now easily possible to play windows games in Linux, thanks to TransGaming Technologies' Cedega, formerly known as the Winex. Based on the wine project this software tries to run windows games in Linux using OpenGL. Many popular games are now playable in Linux including Need For Speed Carbon, FIFA 06, Oblivion, Max Payne, Hitman, Half Life 2 etc.

I installed cedega 6 on my Ubuntu 7.04 yesterday and was able to play my favourite game Star Wars Jedi Knight: Jedi Academy on my nVidia card. I had to install nVidia proprietary driver from their site though.

Here is a screenshot of the game that I have been playing for the last few hours:

Monday, April 30, 2007

OpenDNS + Bind = Turbocharged DNS resolving

At first I would like to thank my friend Autunu for informing me about OpenDNS.

"OpenDNS offers DNS resolution for consumers and businesses as an alternative to using their Internet service provider's DNS servers. By placing company servers in strategic locations and employing a large cache of the domain names, DNS queries are processed much more quickly, thereby increasing page retrieval speed."

Here is a quick howto to on using open DNS with bind in linux. For those who don't know, bind is the standard domain name server solution in linux.

In Debian/Ubuntu:
#apt-get install bind9

This will install bind server in your PC.

Now we want to use our local server as the DNS server. So open the following file: /etc/resolv.conf, erase all the contents and add the following line:

nameserver 127.0.0.1

Now here is the DNS forwarding trick to OpenDNS servers:

Open the following file /etc/bind/named.conf.options and look for the lines like this:
options {
forwarders {
............;};
};

Change those lines to look like this:

options {
forwarders { 208.67.222.222; 208.67.220.220; };
...
};
Restart bind server:

#/etc/init.d/bind9 restart

Walla! Done. After browsing for some time, you shall start to see the difference.

Here is what happens after you have done the above mentioned things:

When you try to open a web page, first the request is sent to your local server, if the DN of the page is not found then bind forwards that request to OpenDNS server and the DNS is fetched from there. As we know OpenDNS is generally faster that conventional DNS server you get here a speed boost. But then, that DN gets saved in your local bind server. So when you try to visit the page for the second time, your local server can resolve the request by itself and the page loads instantly, again providing another speed boost.

A complete howto on configuring OpenDNS in windows is covered here, in Autunu's blog,

Friday, April 27, 2007

Accessing Mobile Phones in Sid

I had been searching for a software that could enable me to access the contents of my Siemens M65. Today I came across Gammu that enabled me to do it all. Wammu is a gtk frontend that makes things easier.

This is how I installed and configured those two:

#apt-get install wammu gammu

Now I had to make a configuration file for my M65:

#vim ~/.gammurc

Now added these lines there:

[gammu]
port = /dev/ttyUSB0
connection=at115200
name=M65
model=at

Now I ran wammu and from the phone menu selected connect. Now I was able to do all the cool stuffs in linux that I was used to doing in windows from mobile phone manager sofware. The most important feature is the backup mode that enbles one to create backups of messages and contacts.


Here is a sreenshot from the message section:

Monday, March 19, 2007

Xen intallation in Sid

Yesterday I installed and configured xen in my PC. Here is a short description of what you need to do:

1. First intall xen kernel images, modules along with some utilities.

#apt-get update

#apt-get install linux-image-2.6.18-4-xen-686 linux-modules-2.6.18-4-xen-686 xen-hypervisor-3.0.3-1-i386 xen-linux-system-2.6.18-4-xen-686 xen-tools xen-utils-3.0.3-1 xen-ioemu-3.0.3-1 bridge-utils debootstrap libc6-xen xen-utils-common rpmstrap iproute sysfsutils

[Note: packages 'linux-image-2.6.18-4-xen-686 linux-modules-2.6.18-4-xen-686 xen-hypervisor-3.0.3-1-i386 xen-linux-system-2.6.18-4-xen-686 xen-tools xen-utils-3.0.3-1 xen-ioemu-3.0.3-1' are version specific and may have other versions depending on your system, so you need to change their version sometimes.]

2. After the packages have been installed properly boot from the new xen kernel.

3. Open /etc/xen/xend-config.sxp file. Make sure that the following lines are there:

(logfile /var/log/xen/xend.log)
(network-script network-bridge)
(vif-script vif-bridge)

And also make sure that the following line is NOT there:

(network-script network-dummy)

4. #mkdir /home/xen -p

5. Now we need to edit /etc/xen-tools/xen-tools.conf file. This is a sample configuration for running Debian sarge on a 4GB HDD with 256 mb of ram

dir = /home/xen
debootstrap = 1
size = 4Gb
memory = 256Mb
swap = 256Mb
fs = ext3
dist = sarge
gateway = 192.168.1.1
netmask = 255.255.255.0
passwd = 1
kernel = /boot/vmlinuz-2.6.18-4-xen-686
initrd = /boot/initrd.img-2.6.18-4-xen-686
mirror = http://ftp.us.debian.org/debian/

If you want to set-up an rpm based system like centos then put 'rpmstrap = 1' instread of 'debootstrap = 1' and change 'dist = sarge' to 'dist = centos4'.

6. Now create and image for that configuration:

#xen-create-image --hostname=sarge-xen --ip=192.168.10.2 --boot

7. After the installation has finished you have enter your new password and the new system will boot

8. When you need to shutdown your system:

#xm shutdown sarge-xen

9. When you need to open that image for work:

#xm create sarge-xen.cfg -c

Now my sarge is runnning in console mode. I'll come up with more on this when I have time. Until then ... ...

Sunday, February 11, 2007

Porting GTK+ application to Windows

My term project in GTK was going on pretty well on my Debian until I had to show a demo to my teacher. And currently all the PCs in our labs only run windows. So I was pretty sure that I had no other way but to show the demo in windows. As everyone knows, GTK is multi-platform and with a bit of effort anyone can port GTK programs written in Linux to Windows in no time.

Here is how I compiled my GTK codes in VS 6.0:

Downloaded GTK runtime library and and GTK development installer files from this site

http://gladewin32.sourceforge.net/

There are two separate files, you need 2 download both of them: gtk-2.10.7-win32-1.exe and gtk-dev-2.10.7-win32-1.exe

Installed them both in C:\GTK

Now in VS 6.0 "File" > "New" > "Projects" > "Win32 Console Application" > "An Empty Project"

From Projects menu "Add to Project" > "New" > "Files" > "C++ Source File

Added a demo Gtk Code inside the file I named as gtk1.c:

// blogger seems to have some problem when i put angled brackets around gtk/gtk.h :((
#include gtk/gtk.h

void closeApp(GtkWidget *widget, gpointer data)
{

gtk_main_quit();

}

int main( int argc, char *argv[] )
{
GtkWidget *window;

gtk_init (&argc, &argv);

window = gtk_window_new (GTK_WINDOW_TOPLEVEL);
g_signal_connect(GTK_OBJECT(window),"destroy",GTK_SIGNAL_FUNC(closeApp),NULL);

gtk_widget_show (window);

gtk_main ();

return 0;

}

Now again in Project Menu > Settings

Here in "C++" Tab In the "Category" > "Preprocessor" under "Additional Include Directories" I put this

C:\GTK\include\gtk-2.0,C:\GTK\include\cairo,C:\GTK\include\glib-2.0,
C:\GTK\lib\glib-2.0\include,C:\GTK\include\pango-1.0,C:\GTK\lib\gtk-2.0\include,
C:\GTK\include\atk-1.0,C:\GTK\include\libxml2

Now in the "Link" tab under "Object/Library modules" put

glib-2.0.lib gobject-2.0.lib gthread-2.0.lib gdk-win32-2.0.lib gdk_pixbuf-2.0.lib gtk-win32-2.0.lib atk-1.0.lib pango-1.0.lib

Now just just after pressing OK, Ctrl + F7 to compile, F7 to build gtk.exe and then Ctrl + F5 to run the programme.

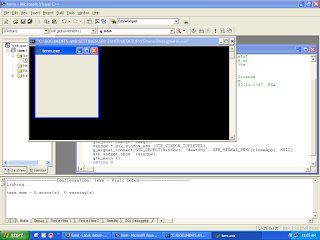
It rewarded me with this GTK window.

Tuesday, February 06, 2007

Supervising terminal activity remotely

Suppose you started a process in terminal of your PC and then logged into your PC via ssh from another PC. Now u want to see what's going on in the terminal in the first PC. There are mainly two different approaches that I've come accross. Here's the first solution. This one is fairly simple:

In the main PC I run:

$mkfifo foo; script -f foo

In the second PC, I log in via ssh and then run in the terminal:

$cat foo

Now whatever I run in the 1st PC's terminal, it gets showed (including all the verbose output) in the second PC.

This simple solution has a minor drawback, second PC's terminal becomes read-only, You don't get any kind of interactivity from the second shell. To solve this problem we'll take help of another tool, GNU 'screen'.

#apt-get install screen

$vi ~/.screenrc

Add these lines:
hardstatus on
hardstatus alwayslastline
hardstatus string "%{.bW}%-w%{.rW}%n %t%{-}%+w %=%{..G} %H %{..Y} %m/%d %C%a "
Now comes the most important part:

In the main PC I open a shell:
$screen

Now I log in via ssh from the remote PC and run this in shell:
$screen -x

Now whatever I run in the first PC, I get another output in the second terminal and both the terminal's are interactive.

Now you can ask, what if I want to close either of the screens and keep the other one active? Just press Ctrl + a, d in any screen. The screen gets detached.

If you want to resume an already detached screen:
$screen -r

Some tips:
  • Screen can also manage multiple terminal sessions in it. To create new tab, Ctrl + a, c and then you can cruise between the tabs by pressing Ctrl + a, Ctrl + a repeatedly.
  • Ctrl + a, " shows you the list of available tabs
  • Ctrl + a, A gives you a promt to change the name of current tab
  • Ctrl + a, k closes the current tab
  • Ctrl + a, S splits the currnt window into two separete workspaces, You can browse between them by Ctrl + a, TAB
  • You can also run 'screen' in a nested manner. Cool huh!
You can find more info here:
http://www.kuro5hin.org/story/2004/3/9/16838/14935

Thursday, February 01, 2007

Term Project and GTK

I have been assigned a project from my Univ for this term. My prject is 'Online Exam System'. I have 2 make it with only C. We were supposed to make this in TC as we'd need graphic.h 4 as the graphics library (now u can guess why I fiddled so much with TC and graphic.h in my earlier posts, lolz). But I wanted to try something else. So I talked with our sir and after a lot of work he gave me the permission to make the project using GTK.

Plese pray 4 me so that I can finish it well.

Qemu with accelerated module

"QEMU is a fast processor emulator: currently the package supports arm, powerpc, sparc and x86 emulation. By using dynamic translation it achieves reasonable speed while being easy to port on new host CPUs."

To get the best performance outta qemu, it neeeds to be run with kqemu accelerator. Here is a short how-to to achive that.

#apt-get install qemu qemu-launcher qemuctl
#apt-get install kqemu-source

U also need 2 have your kernel header files installed properly. And we shall also need module-assistant

#apt-get install linux-headers-`uname -r`module-assistant

Now comes the module building work:
#m-a prepare; m-a update; m-a a-i kqemu #depmod -a
Reboot ur pc. Then #lsmod, if u dont see something like 'kqemu' then #modprobe kqemu.

Now we can run qemu with the help of qemu-launcher. In qemu-launcher's interface dont forget to check on Full for the acceleration option in the Emulator tab. Otherwise we won't get the speed we are looking for.


Well, here is a screenshot of my Sid running Window XP SP1 with qemu.

Tuesday, January 30, 2007

Vmware in Sid

Here's how I confugured Vmware in my Debian sid:

Added necessary repos in /etc/apt/sources.list
#echo "deb http://www.fbriere.net/debian/dists/unstable ./" >> /etc/apt/sources.list
#echo "deb-src http://www.fbriere.net/debian/dists/unstable ./" >> /etc/apt/sources.list

Installed with apt-get
#apt-get install vmware4 vmware-source module-assistance linux-headers-`uname -r`

Now comes the module installation process

#m-a prepare, m-a update; m-a a-i vmware

If this does not work for some realson, do the following to compile the module manually

#cd /usr/src
#tar xvjf vmware.tar.bz2
#cd /usr/src/modules/vmware
#make
#mkdir -p /lib/module/`uname -r`/misc/
#ln vmmon.ko vmnet.ko /lib/modules/`uname -r`/misc/
#depmod -a

See if the modules got installed properly:
#lsmod
The two entrises confirmed that
vmnet 28396 0
vmmon 167180 0

Monday, January 29, 2007

Oracle 10g in Debian Sid

Today I installed and configured Oracle 10g Express Edition in my Debian Sid.

Here is how I did this:

#echo "deb http://oss.oracle.com/debian/ unstable main non-free" >> /etc/apt/sources.list
#apt-get update
#apt-get install oracle-xe oracle-xe-client

I had to download about 250 MB of installation files. Then the installer smoked me with this error message:

"This system does not meet the minimum requirements of swap space. Based on the amount of physical memory available on the system, Oracle Database 10g Express Edition requires 1008 mb of swap space. This system has 509 mb of swap space. Confugure more swap space on the system and retry the installation."

I had to enlarge my swap space to 1024 mb and the started the installer again. This time oracle got installed perfectly.

Then I had 2 do this:

#/etc/init.d/oracle-xe configure

Just answered yes to all the questions and orcacle got configured perfectly.

Then opened my web browser and put "http://127.0.0.1:8080/apex" in the address bar.

An interface like below popped up in the browser:


Entered 'system' for the username and provided the password that I used during the post-installation confugure process.

Friday, January 26, 2007

Running TC in Linux

Last time I posted how 2 use graphics.h in Linux. That really works great 4 me, but there is a simple catch. Sometimes it requires some minor modification to our code. But when you don't have that time to modify the code? Well, there's simple no other way that 2 run Turbo C in Linux. :D

I heard that there is a Linux version of Turbo C out there but could not find any. Then how did I run Turbo C in Linux? I did that in the most stupid way. See 4 yourselves.

#apt-get install dosbox

After installation I did this:

$dosbox

A black window came like below:


Here in the prompt I put this:

Z:\>mount c ~
Z:\>C:

This mounted my home dir to drive letter C.

I had TC installer in my home folder. So ran the installer and installed it this in C:\TC\BIN

C:\TC\BIN>tc

Now I there was the most intriguing part, TC's UI was there. I had 2 set a few environment variable's in TC and then compiled This Program without error:

Thursday, January 18, 2007

graphics.h in Linux

For my Univ project, I need 2 use graphics.h. Everyone knows graphics.h is not in C's standard library. Only Turbo C supports it and for that I need 2 use windows all the time which I don't like. So I had 2 find an alternate way of doing it and libgraph was just the thing I needed most. 'libgraph' is mainly a wrapper around SDL's libraries that effectively provides most of the functions of graphics.h.

Here is how I set up libgraph in my Debian Sid:

Downloaded the latest version of libgraph from this site:

http://download.savannah.nongnu.org/releases/libgraph/

First installed some libraries that libgraph depends on:

#apt-get install libsdl-image1.2 libsdl-image1.2-dev guile-1.8 guile-1.8-dev

(if you are using other distros like Fedora or Suse, packages 4 these distros are also avalable)

Extarcted the tarball

$tar xvzf libgraph-1.0.2.tar.gz

Then inside the folder ran this:

$./configure
$make
#make install

The default destination for the shared library files is /use/local/lib, if this path is not included in your library path (mine was not) then u have to add that manually in your /etc/ld.so.conf

Our installation is complete now. Now I make a simple test.c with these codes:

#include stdio.h
#include graphics.h

int main(void)
{
int gd=DETECT, gm=VGAMAX;
initgraph(&gd, &gm, 0);
moveto(0, 0);
rectangle(50,50,500,200);
while (!kbhit());
closegraph();
return 0;
}

[Note: There seems 2 be some problem when I try to put stdio.h inside angled brackets so I'm writing that normally]

Now when we need 2 compile this test.c file we need 2 provide '
-lgraph' flag

$gcc test.c -o test.out -
lgraph

Walla! I saw a black window with a rectangle in the middle.

Tuesday, January 16, 2007

Moved my Sid to a new HDD

I had been using Sid on a 40 Gb HDD which was running out of life. A couple of bad sectors in the root partition made me buy a new 80 Gb HDD.

Here is how I moved my whole system to new HDD:

First i booted with ubuntu live cd. Partitioned the new hard drive with some ext3 filesystem. Then mounted them:

#mount -t ext3 /dev/hda5 /mnt/new_debian
#mount -t ext3 /dev/hdc6 /mnt/old_debian

#cp -av /mnt/old_debian/. /mnt/new_debian/.

Then mounted proc
#mount -t proc /proc /mnt/new_debian/proc

#chroot /mnt/new_debian /bin/bash
#cd /dev
#/sbin/MAKEDEV generic

Now editted fstab and mtab to reflect my new hdd setting (i.e. my new root and swap partitions):

#vim /etc/fstab
#vim /etc/mtab

Then ran grub

#grub
> root (hd0,4)
> setup (hd0)
> quit

#grub-install /dev/hda

My new system is working as good as my old one now.

Thursday, January 11, 2007

Write access on NTFS volume in Linux

Getting write access on a NTFS volume is a bit hairy in Linux. But that has been made easy by ntfs-3g driver.

"The NTFS-3G driver is an open source, freely available NTFS driver for Linux with read and write support. It provides safe and fast handling of the Windows XP, Windows Server 2003, Windows 2000 and Windows Vista file systems. Most POSIX file system operations are supported, with the exception of full file ownership and access right support."

I installed it in my debian sid in this way:

#apt-get install ntfs-3g

Then editted /etc/fstab like this:

/dev/hda1 /mnt/win_c ntfs-3g rw,user 0 0

then executed this in root shell to grant my access 2 that drive as normal user.

#adduser fuse

You can find more info on this on http://www.ntfs-3g.org/

Thanks to Mr. Jamil Ahmed to pointing me to this amazing stuff.

Wednesday, January 10, 2007

Run wvdial as normal user

Here is a way I found out to run wvdial as a normal user:

#adduser <you> dip
#adduser <you> dialout
#chmod 660 /etc/wvdial.conf

Now you can run wvdial as normal user. No need 2 be root.

Tuesday, January 09, 2007

PWD webpage

I, along with my friend salahuddin and lavluda developed a web portal for for the Public Works Department of Bangladesh. We developed the basic structure of the web portal by using Joomla CMS and then customized it to our needs.

The address of the portal is http://www.pwd.gov.bd/

Back to Blogging

After a failed attempt last year to get back to blogging, I'm trying it again this year. I really wanted to get back, but got busy will...